Building a New Dashboard
Navigation
- Blank – Start a new dashboard from scratch.
- Copy Existing – Duplicate an existing dashboard for editing (changes will not affect the original).
After creating a dashboard, you’ll be redirected to the customization page.
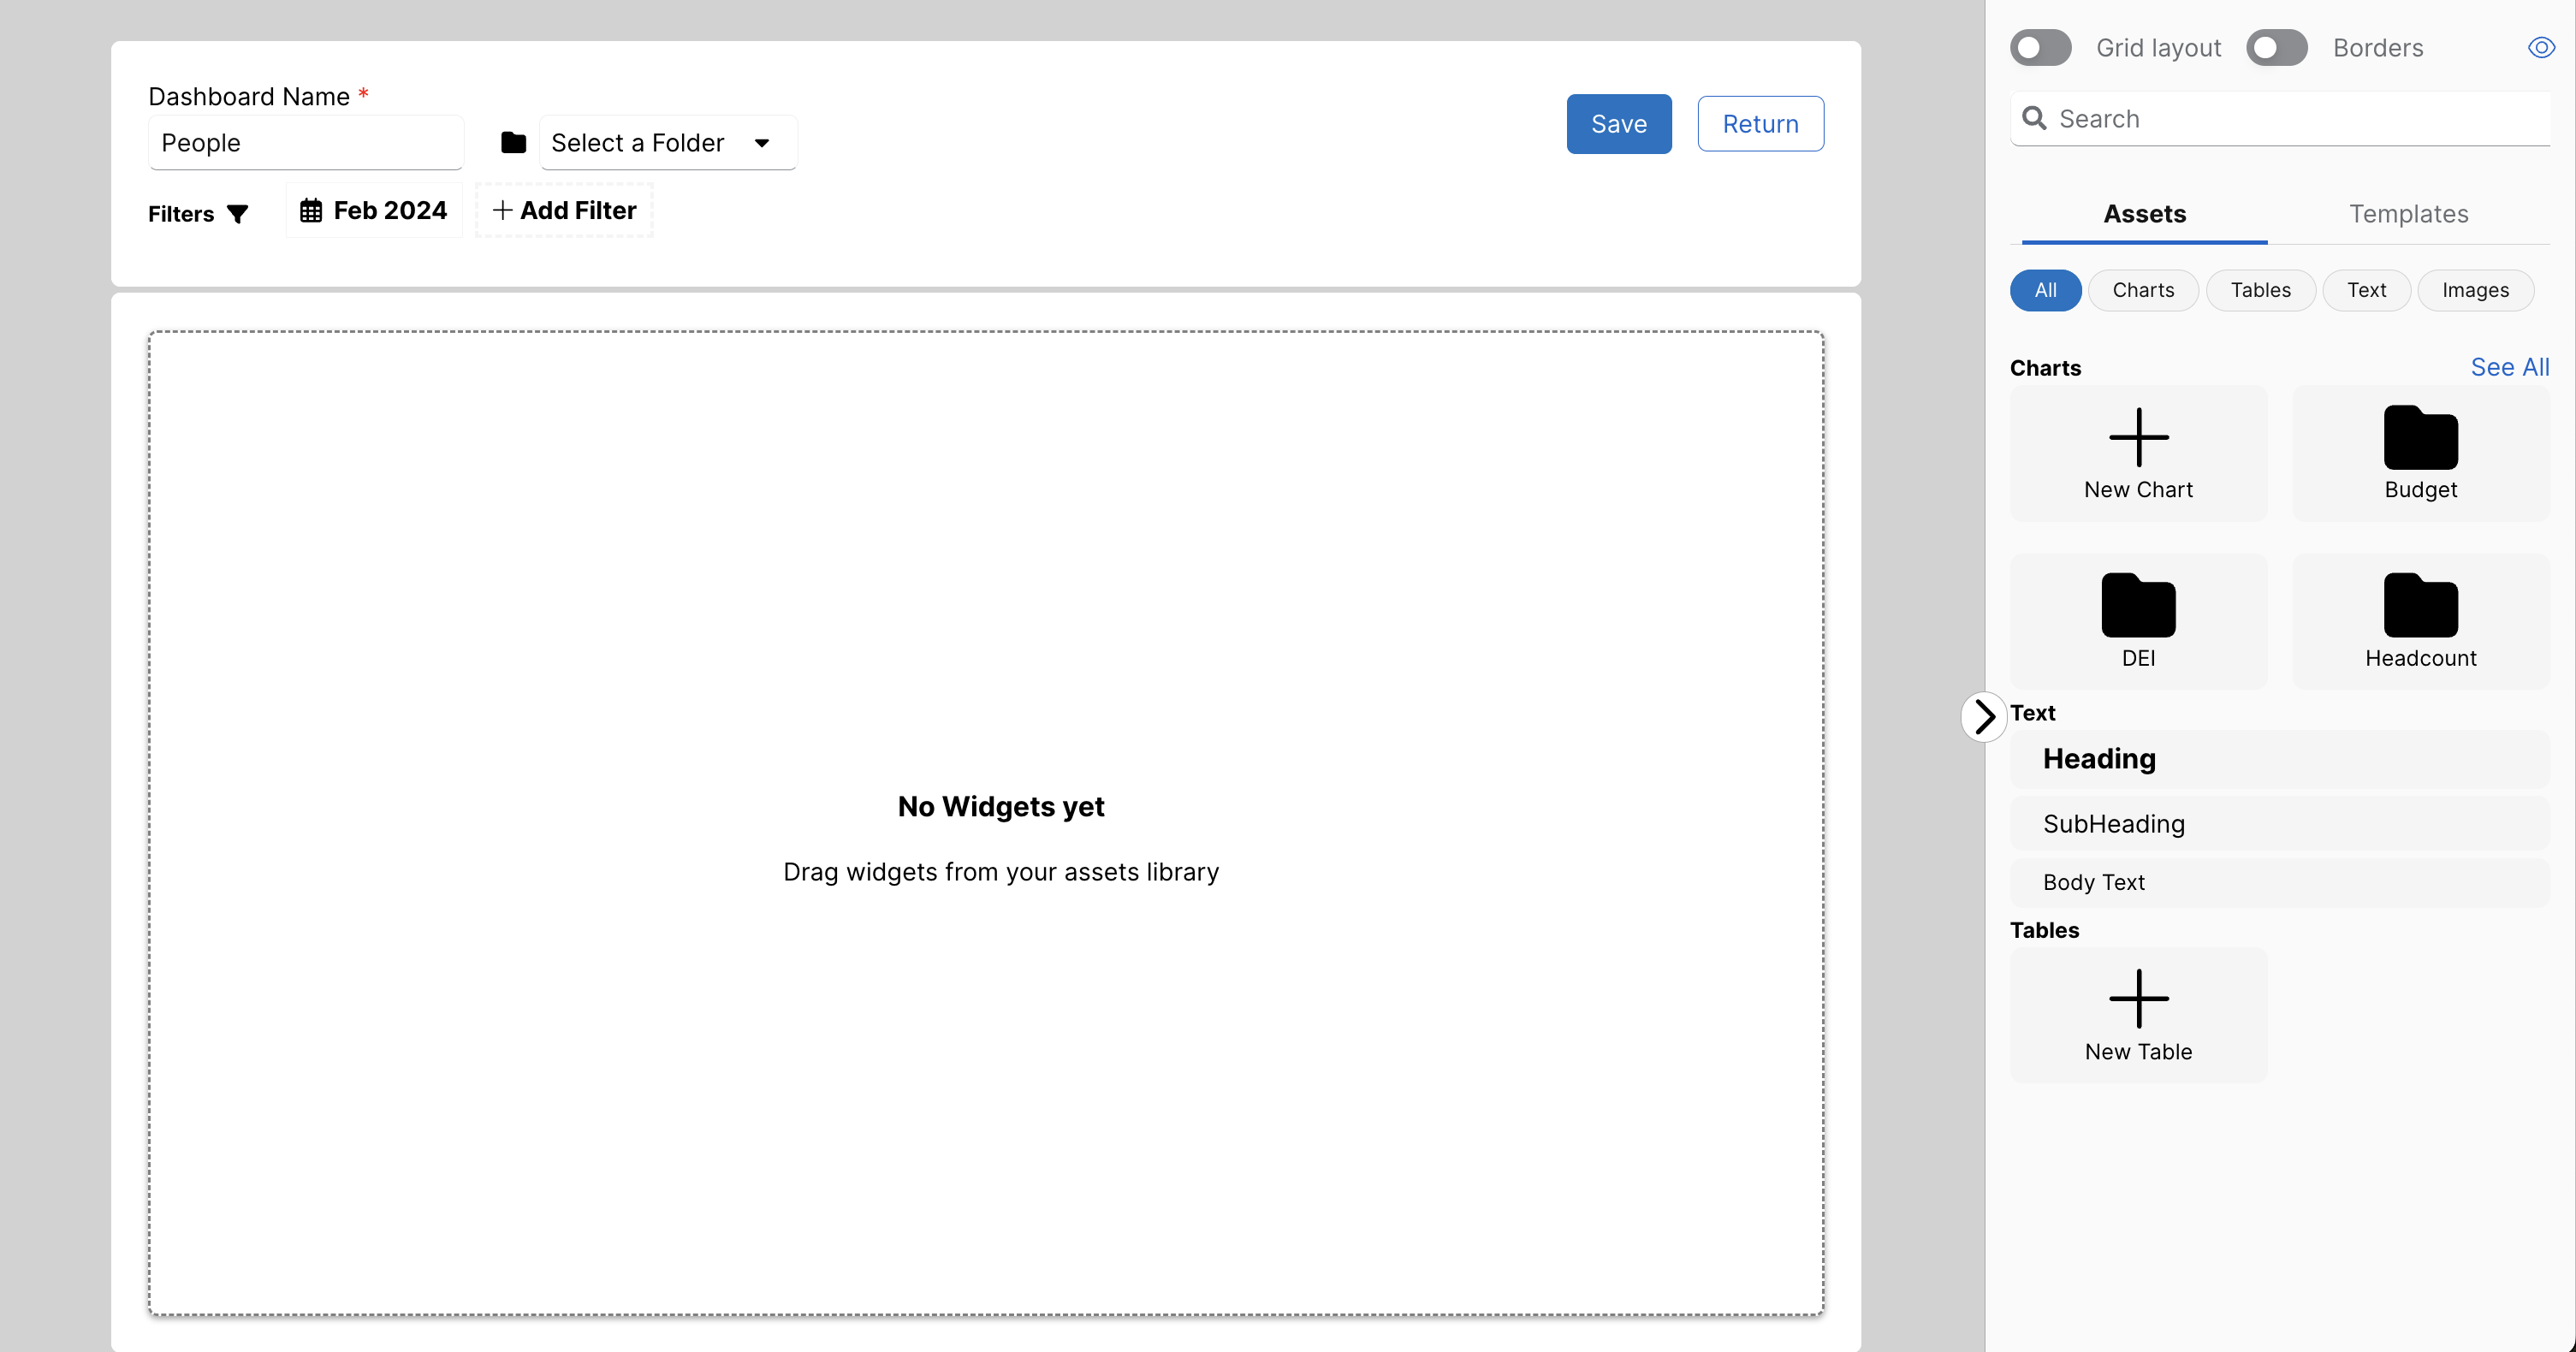
Dashboard Layout & Widgets
At the top, you’ll find the dashboard title, location, and global filter options. Below is the main dashboard area, where you can arrange and customize widgets.
On the right side, you can drag and drop widgets—including charts, tables, text boxes, and images—into the dashboard. You can also create new charts or tables by selecting “New Chart” or “New Table” from the right-side menu.
Editing & Managing Widgets
- Moving & Resizing – Click and drag widgets to reposition them. To resize, adjust the bottom-left corner.
- Deleting – Click the trashcan icon in the top-right corner of a widget.
- Editing – Select the pencil icon to open customization options.
Adding & Customizing Text
Under the Text section in the left menu, you can add:
- Heading
- Subheading
- Body text
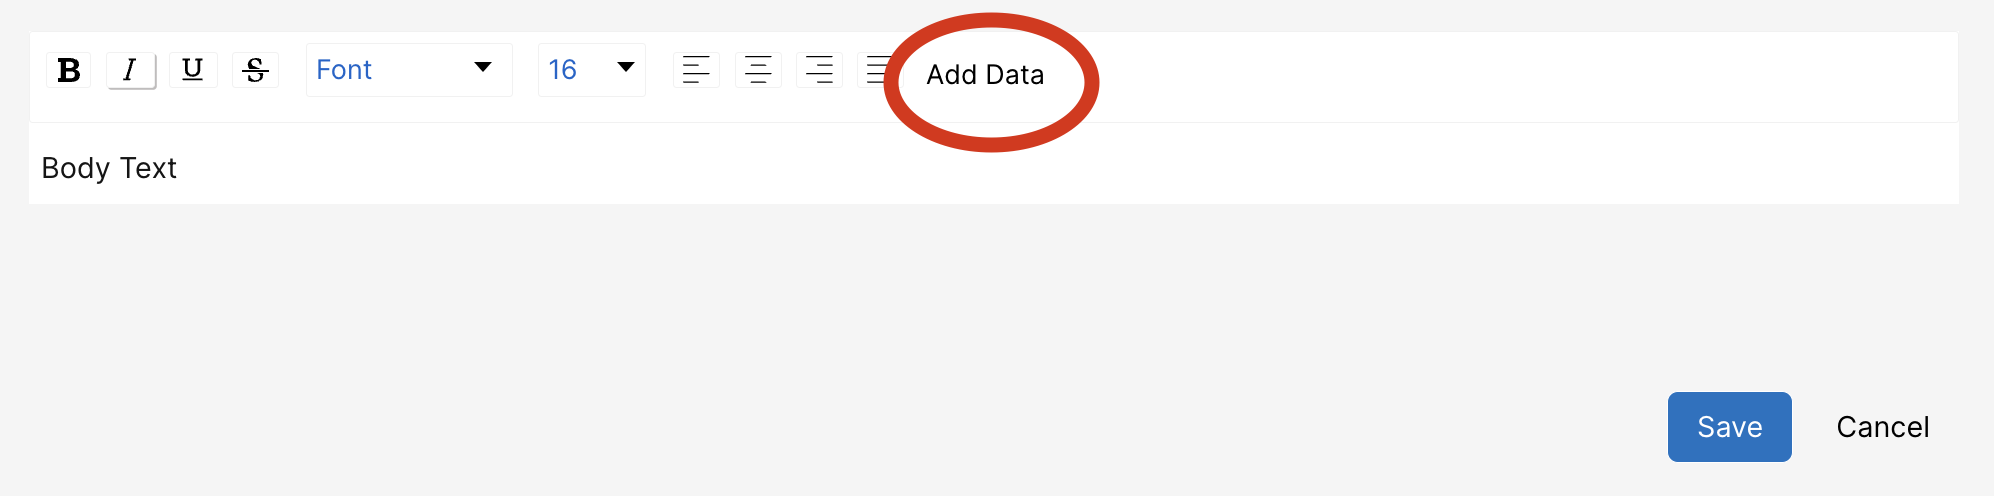
Once added, you can adjust the font, text size, alignment, or even insert dynamic data based on a key measure or dataframe. To do this, open the text editor using the pencil icon, select “Add Data,” and choose the key measure or dataframe. This will insert a code into the text box, displaying the selected data for the relevant time period.
Once you’ve finished making changes, click Save at the top to apply them. Your new dashboard will be accessible from the Dashboard tab on the Analyze page, either on the main dashboard page or within its designated folder.
No Comments